
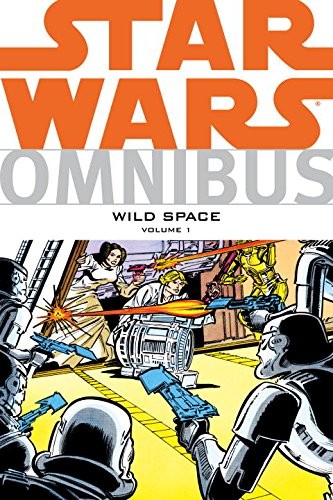
Star Wars Omnibus: Wild Space #1
☆ Be the first to review + Add to your collection — Join free"A Dread Discovery!" kicks off Star Wars Omnibus: Wild Space #1 with a tense, atmospheric tale from Chris Claremont and Carmine Infantino, whose dynamic artwork brings the eerie mystery of Alashan to life. When a deadly artificial creature reemerges to kill Lopaki, Leia and Luke must unravel its origins—leading them to a shocking revelation about its control and vulnerability. Cover by Carmine Infantino and Steve Mitchell captures the story’s haunting tone, making this a standout entry in the Wild Space saga.
In "A Dread Discovery!", Luke and Leia survey the unknown world they've crash-landed on, only to stumble upon a massive, unsettling footprint—evidence that they're not alone. As the Imperial fleet above sends a TIE Fighter to scour the surface, the siblings brace for what might be waiting in the shadows.
In "A Matter of Monsters!" from Star Wars Omnibus: Wild Space #1, Luke and Leia stumble upon a towering creature on a remote planet—only to discover it’s a frightened child separated from its enormous parent. When a TIE Fighter patrol arrives, drawn by the commotion, the Rebels must stay hidden as the child’s guardian emerges from the shadows.
In "Pursuit among the Ruins!" from Star Wars Omnibus: Wild Space #1, Luke, Leia, and the droids flee Imperial forces through the crumbling streets of a forgotten city, their escape cut short when C-3PO inadvertently triggers a hidden mechanism—sending the four rebels vanishing into the unknown.
In "Do You Know What Your Children Are?", four Rebels stumble upon a hidden enclave on a distant planet, where they encounter four children whose combined abilities seem to command the very forces of nature. As Imperial forces close in, the fragile peace of the moment shatters, forcing the group into a desperate flight.
In "Caverns of Mystery!" from Star Wars Omnibus: Wild Space #1, four children—Jo, Miko, Tarn, and Rill—navigate a hidden network of alien caverns, their every move guided by an ancient, sentient force. When an Imperial patrol stumbles upon their refuge, the kids use their unique bond to outwit the soldiers, leading the Rebels straight to the mysterious entity that shaped them: The Keeper.
In "The Keeper's Secret!", Jo and the other children uncover the truth behind their origins when the Keeper reveals it was built by a long-lost species to preserve their memory—creating the children as androids in their likeness. As Imperial forces close in, a sudden explosion triggers violent tremors beneath the ruins, threatening to expose everything.
In "The Final Fury!", the Keeper devises a desperate plan to protect the Rebel cell from the Empire’s reach—faking the Rebels’ deaths before repairing their ship to ensure their secret escape. With tension high and time running out, the fate of the group hangs on a single, carefully orchestrated deception.
Luke, Leia, and the droids land on the frozen world of Akuria Two, hoping to reach the local Rebel cell—only to be ambushed by TIE Fighters and forced down into a vast, icy wilderness. Now stranded in a hostile landscape, they must survive the elements and evade Imperial forces while searching for a way to signal for help.
In "The Snow Demons!", R2-D2 stumbles upon a derelict TIE Fighter with no pilot, only to have he and C-3PO captured by a band of furry Snow Stompers. Meanwhile, Luke and Leia face a towering War Sled and its imposing driver, who claims to be the Rebel leader Colonel Odan.
In "Treachery!", Luke and Leia tour the War Sled, a relic of a forgotten conflict, as the droids are quietly led away—only for the real Colonel Odan to emerge, revealing the ship was once his before the Imperials stole it.
In "Death Trap!" from Star Wars Omnibus: Wild Space #1, Luke and Leia find themselves trapped aboard a derelict War Sled after uncovering that their host, Colonel Odan, is actually an Imperial officer in disguise. With Leia held captive and Luke sealed inside the malfunctioning sled hurtling toward a deadly ocean crash, the real Colonel Odan prepares a daring rescue using a Snow Flyer.
In "Snow Fury!", Odan and Luke find themselves trapped on a speeding War Sled hurtling through a blizzard, their escape from captivity only the beginning of a desperate fight for survival. With the storm closing in and the sled destroyed, they're left stranded in the frozen wilderness, forced to rely on each other to endure the merciless cold.
In "Pursuit!", Luke races to rescue Leia from Imperial forces, commandeering an Imperial Snow Flyer to infiltrate a hidden base. With stealth and precision, he strikes from within, turning the tide in a high-stakes mission that leads to Odan's formal commitment to the Rebel cause.
In "Way of the Wookiee!" from Star Wars Omnibus: Wild Space #1, Han and Chewbacca take on a dangerous job for Jabba the Hutt, leading them to the planet Formos where they meet their contact, N'Mrith. When Chewbacca spots another Wookiee being captured by Stormtroopers, his instinct to act puts their mission—and Han’s careful plans—in jeopardy.
In a rare solo moment, Chewbacca recounts his past rivalry with Hronk on Kashyyyk to Han as they prepare for the Kessel Run. When Imperial forces capture Hronk, Chewbacca must choose between loyalty to his friend and the mission at hand.
In "Switch!", Han Solo finds himself caught between loyalty and survival when he agrees to help Chewbacca smuggle a mysterious passenger named Hronk from Imperial forces. With betrayal from N'Mrith and a last-minute decision to ditch the spice, Han must navigate the aftermath—both with the Empire and the ever-watchful Jabba the Hutt—while Hronk’s arrival at a new port quietly shifts the balance between Chewbacca and his unlikely companion.
In "Empire Kills!" from Star Wars Omnibus: Wild Space #1, Luke encounters the young pilot of a crashed TIE Fighter, leading to a tense confrontation that tests his resolve. The story explores the moment when duty clashes with compassion, as Luke faces a choice that challenges the cost of victory.
In "The Weapons Master!", Leia’s sharp combat skills during a tense rescue mission leave Luke and the droids puzzled—especially since Alderaan had no tradition of warfare. As she deflects danger with precision, she recounts how Giles Durane, a retired warrior, trained her in secret, while an Imperial agent named Emir sent the assassin Torgas to eliminate her.
In "Day of the Assassins!", Leia faces a deadly test aboard Giles’s ship when assassins sent by Torgas launch a brutal ambush. With Giles and his ally Gimlet fighting to protect her, Leia proves her skill—but even she knows she’s not yet fast enough, precise enough. Torgas, watching from afar, makes it clear: he’ll finish what his assassins started.
In "My Enemies Surround Me!", Leia recounts a tense ambush on Challon, where a deadly confrontation unfolds after Torgas strikes, killing Gimlet. With Giles betraying her—revealing he was hired to replace Torgas—Leia must face the man who once trained her, ending their bond in a moment that leaves her both haunted and resolved.
In "World of Fire!", Luke, Leia, and the droids sneak into the Empire’s heavily fortified Foundry, aided by the mysterious Mici, as they race to seize the Staraker—Imperial engineering at its most dangerous. With the Rebel base on Alashan destroyed and deadly automated defenses still active, every step forward is a gamble.
Luke and Leia, newly escaped from Foundry, are sent to Alashan to uncover the truth behind the base’s destruction. There, they discover a fleet of TIE Fighters and a Star Destroyer—only to be thrown into chaos when a sudden burst of energy from the planet’s surface obliterates the Star Destroyer.
In "Molten Doom!", Luke Skywalker, guided by the lingering presence of Ben Kenobi, struggles to steer the Staraker to safety as an ominous energy beam from the planet Alashan sends the ship hurtling toward disaster. With Mici injured and the vessel swallowed by molten rock, the crew finds themselves trapped beneath a world of fire and fury—where escape is far from certain.
In "The Word for World Is Death!", Luke finds himself stranded on a volatile world after a desperate medical procedure on Mici, forcing him to carve a path through volcanic rock with his lightsaber. Emerging into the open, he’s met not by allies, but by a lone Grau, an Imperial commando whose presence changes everything.
In "Unholy Alliance!", Luke and Leia find themselves temporarily allied with the ruthless mercenary Grau as they search the ruins of a Rebel base, their uneasy truce tested when the planet’s deadly automated defenses strike again. With Grau’s sharp-eyed subordinate Kyril Lopaki eager for blood, the group must navigate the treacherous remains before the next attack—survival hanging on fragile cooperation.
In "A Creature in the Stars!" from Star Wars Omnibus: Wild Space #1, a long-forgotten defense system awakens on Alashan, unleashing a creature that stalks the Staraker. With R2-D2 using his tech to mask Mici’s presence, Luke, Leia, and Grau’s forces push deeper into the ruins, uncovering a secret the Rebels had unearthed on the planet—while above, the creature strikes down a lone Stormtrooper left behind.
In the forgotten depths of Alashan, Luke and his companions uncover an ancient, abandoned city—its towering spires humming with forgotten technology. As a mysterious creature from above hunts them through the ruins, they make a desperate choice that seals their fate: cutting off their only escape, leaving them trapped in the heart of a labyrinth with no way out.
In "Betrayal!", Leia and Luke race to uncover the secrets of a dying city, only to find their trust tested when Lopaki, once an ally, reveals his true intentions. As the city's systems flicker back to life, the danger escalates—Leia must confront the shifting loyalties in the shadows, while Luke fights to protect her from a threat that's both familiar and terrifying.
In "The Monster's Secret!" from Star Wars Omnibus: Wild Space #1, Leia and Luke confront a terrifying creature on the remote planet Alashan, where its deadly return forces them to uncover a chilling truth: the beast is no natural horror, but a machine controlled by hidden consoles. As they race to dismantle its power source, Luke discovers the creature’s energy-based nature—and that its destruction lies in a single, precise strike.
In "Blind Fury!" from Star Wars Omnibus: Wild Space #1, Jo stumbles upon an ancient enemy of the Jedi—Rur, a shaman whose consciousness now exists as a vengeful program. When Rur sets a trap for Luke, the truth emerges: the Jedi are gone, and the program’s purpose collapses with them.
In "Rust Never Sleeps," C-3PO and R2-D2 find themselves stranded on Ronyards, a vast planet-sized junkyard where forgotten droids have formed a hidden society. As they witness the planet’s mysterious ability to react to threats—like the sudden destruction of a Star Destroyer—they begin to wonder if the world itself might be alive, guiding their fate.
In "The Pandora Effect," Leia, Han, and Chewbacca stumble through a mysterious portal into a realm where strange beings wield powers that defy logic, imprisoning otherworldly creatures in a bizarre zoo. When Chewbacca’s unexpected strength frees the fearsome Wutzek, the creature turns on its captors—before sending the Rebels back to their own world.
In "Tilotny Throws a Shape," Leia finds herself drawn into an otherworldly encounter when she stumbles upon a mysterious assembly of cosmic entities experimenting with physical form—entities whose curiosity soon turns to her and a nearby squad of Stormtroopers. The story unfolds with quiet wonder, blending Star Wars’ signature intrigue with a touch of cosmic mystery.
In "Havoc on Hoth," Luke and Han make a desperate return to Yavin—only to find it overrun by the Empire. Forced to flee, they stumble upon the Rebellion’s new refuge on Hoth, where Han crosses paths with Salmakk, a rogue smuggler with a personal interest in the bounty on his head.
Han and Chewbacca set off to Yavin IV in search of a long-lost treasure, hoping a lucky find can finally settle their debt to Jabba the Hutt. With the jungle-shrouded moon offering secrets and danger in equal measure, their mission tests their wits and loyalty—before the prize even comes into view.
In "Imperial Spy," a refugee ship carrying survivors of Alderaan arrives at Yavin IV, seeking refuge with the Rebellion—only to stir suspicion when whispers of an Imperial infiltrator begin to spread. With tensions rising, the weight of loyalty is tested as Han Solo finds himself at the center of a growing web of doubt, and every new arrival becomes a potential threat.
In the lawless reaches of Wild Space, Boba Fett navigates a deadly ambush from rival bounty hunters, his focus sharp and lethal. Just as he escapes the fray, he’s spotted by Dash Rendar, a Rebel operative with his own score to settle. Meanwhile, the Emperor’s shadow stretches across the galaxy—ordering Xizor to close in on Luke Skywalker, setting a trap that could reshape the war.
ComicBooks.com Value
Find on ebay
Where to buy
Read it digitally
Sell my copy
Have this issue — or a whole collection? Get a fair offer from us, skip the marketplace fees and the hassle.
We Buy Collections ▸Full credits
Reprints
↩ Reprints Star Wars Weekly #60 (1979), Star Wars Weekly #94 (1979), Star Wars Weekly #95 (1979), Star Wars Weekly #96 (1979), Star Wars Weekly #97 (1980), Star Wars Weekly #98 (1980), Star Wars Weekly #99 (1980), Star Wars Weekly #104 (1980), Star Wars Weekly #105 (1980), Star Wars Weekly #106 (1980), Star Wars Weekly #107 (1980), Star Wars Weekly #108 (1980), Star Wars Weekly #109 (1980), Star Wars Weekly #110 (1980), Star Wars Weekly #111 (1980), Star Wars Weekly #112 (1980), Star Wars Weekly #113 (1980), Star Wars Weekly #114 (1980), Star Wars Weekly #115 (1980), The Empire Strikes Back Monthly #149 (1981), Star Wars 3-D #1 (1987), Star Wars 3-D #2 (1988), Star Wars 3-D #3 (1988), Star Wars: Shadows of the Empire #[nn] (1996), Classic Star Wars: Devilworlds #1 (1996), Classic Star Wars: Devilworlds #2 (1996), Star Wars AnotherUniverse.com Special Edition #0 (1999), Star Wars AnotherUniverse.com Special Edition #0 (1999), Pizzazz #10, Pizzazz #11, Pizzazz #12, Pizzazz #13, Pizzazz #14, Pizzazz #15, Pizzazz #16
Reprinted in Star Wars Legends Epic Collection: The Rebellion #2 (2017), Star Wars Legends: The Rebellion Omnibus #1 (2022), Star Wars Legends Epic Collection: The Empire #8 (2023), Star Wars Legends Epic Collection: The Rebellion #6 (2024), Star Wars Legends: The Empire Omnibus #4 (2025), Star Wars Legends: The Rebellion Omnibus #3 (2025)
Reviews
Reader reviews
No reader reviews yet.