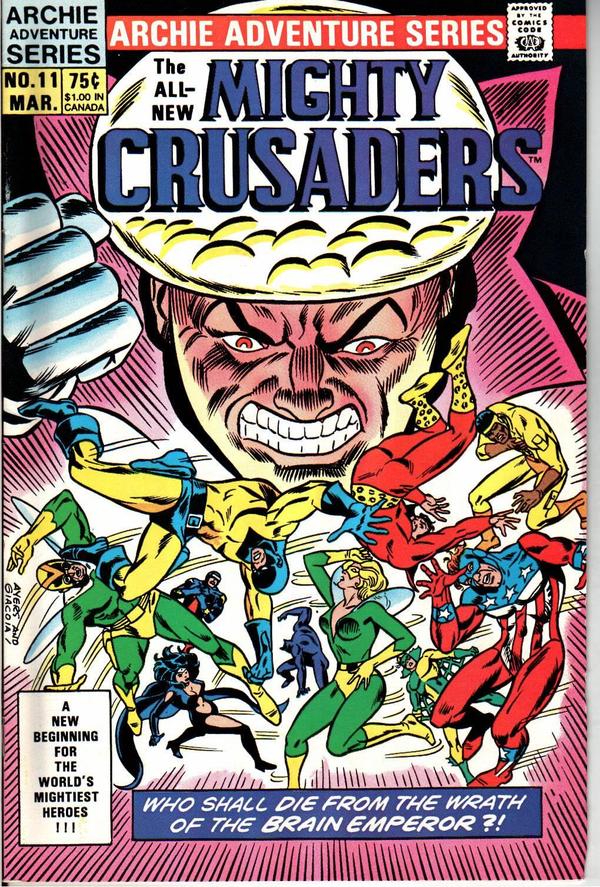
The Mighty Crusaders #11
☆ Be the first to review + Add to your collection — Join freeIn "A Hero's Rage Chapter One," the Mighty Crusaders face their most twisted trial yet as Darkling drags the Fox and the Comet to the Comet’s ship—now a fortress under the tyrannical grip of the Brain Emperor and his allies. With the Fox locked in combat against a legion of foes and the Comet confronting the Emperor directly, the fate of the Crusaders hangs in the balance as the ship hurtles toward destruction. Written by Rich Margopoulos and illustrated by Alan Kupperberg, with inks by Frank Giacoia and Joe Giella, and colors by Barry Grossman, this pivotal issue features a cover by Dick Ayers and Frank Giacoia.
When his uncle Matt Burland is murdered, Kip Burland dons the Black Hood mantle in tribute, then calls on the Mighty Crusaders to help track down the Eraser. A hidden tracker in the costume draws the Riot Squad—Buzzard, Sting, and Eraser—straight to the Crusaders’ base, setting the stage for a tense confrontation.
In "To Die a Hero...! Chapter 2," the Mighty Crusaders face a brutal assault when the Riot Squad—Buzzard, Sting, and Eraser—ravage their headquarters in a violent clash. As the battle turns dire, the Brain Emperor arrives, seizing control of the team, but Dr. Malcolm Reeves remains untouched by his influence—only to be fatally wounded by Sting’s venom. Just before the Emperor’s arrival, Darkling vanishes without a trace.
In the wake of their escape from the Brain Emperor, Darkling seeks out the Fox and the Comet, rallying them to uncover the fate of the imprisoned Crusaders. Together, they journey to the ruins of the headquarters, where they find Dr. Malcolm Reeves—just before his final moments—offering a crucial clue to the missing heroes’ whereabouts. With a solemn gesture, the Comet uses his disintegration vision to cremate Reeves’ body, marking a quiet, poignant end to a life dedicated to the cause.
In "Showdown in Space Chapter 4," the Fox and the Comet find themselves aboard the Comet’s ship, now under the control of the Brain Emperor and his Riot Squad allies. With Darkling vanishing into a mystic dimension and the ship’s fate hanging in the balance, the Comet must confront the Brain Emperor while the Fox fights off the remaining enemies.
ComicBooks.com Value
Find on ebay
Read it digitally
Sell my copy
Have this issue — or a whole collection? Get a fair offer from us, skip the marketplace fees and the hassle.
We Buy Collections ▸Full credits
Reprints
Reprinted in New Crusaders: Legacy #[nn] (2013)
Variants (2)
Reviews
Reader reviews
No reader reviews yet.